Hand Drip - Osmotic Flow 3 Pour Method
This method involves pouring water in three stages to fully extract the delicious flavors from the coffee beans, using the osmotic flow brewing technique. It may sound complicated, but its quite easy to replicate at home and results in a beautifully clean tasting cup of coffee. View the brewing video guide here or follow the notes below.
1. Prepare the Server and Dripper
Set the dripper on the server and preheat it. In this guide, we are using the Origami dripper. Fill the pot with the necessary amount of hot water (enough to fill the server to about 1 cm). Pour the water through the dripper to warm it up.
Swirl the hot water inside the server to ensure the entire surface is warmed up.
If you are using an unbleached paper filter and are concerned about the smell or impurities, set the filter in the dripper and pour hot water through it.
This completes the preheating of the server, dripper, and pot. (Discard the used water.)

2. Set the Paper Filter in the Dripper and Add Coffee Grounds
Use 12g of coffee for 160ml of water as a guideline for 1 serving. Add the required amount of coffee grounds to the dripper. See other coffee to water ratio guides above.
Once you add the coffee grounds, lightly shake the dripper side to side to level the grounds.

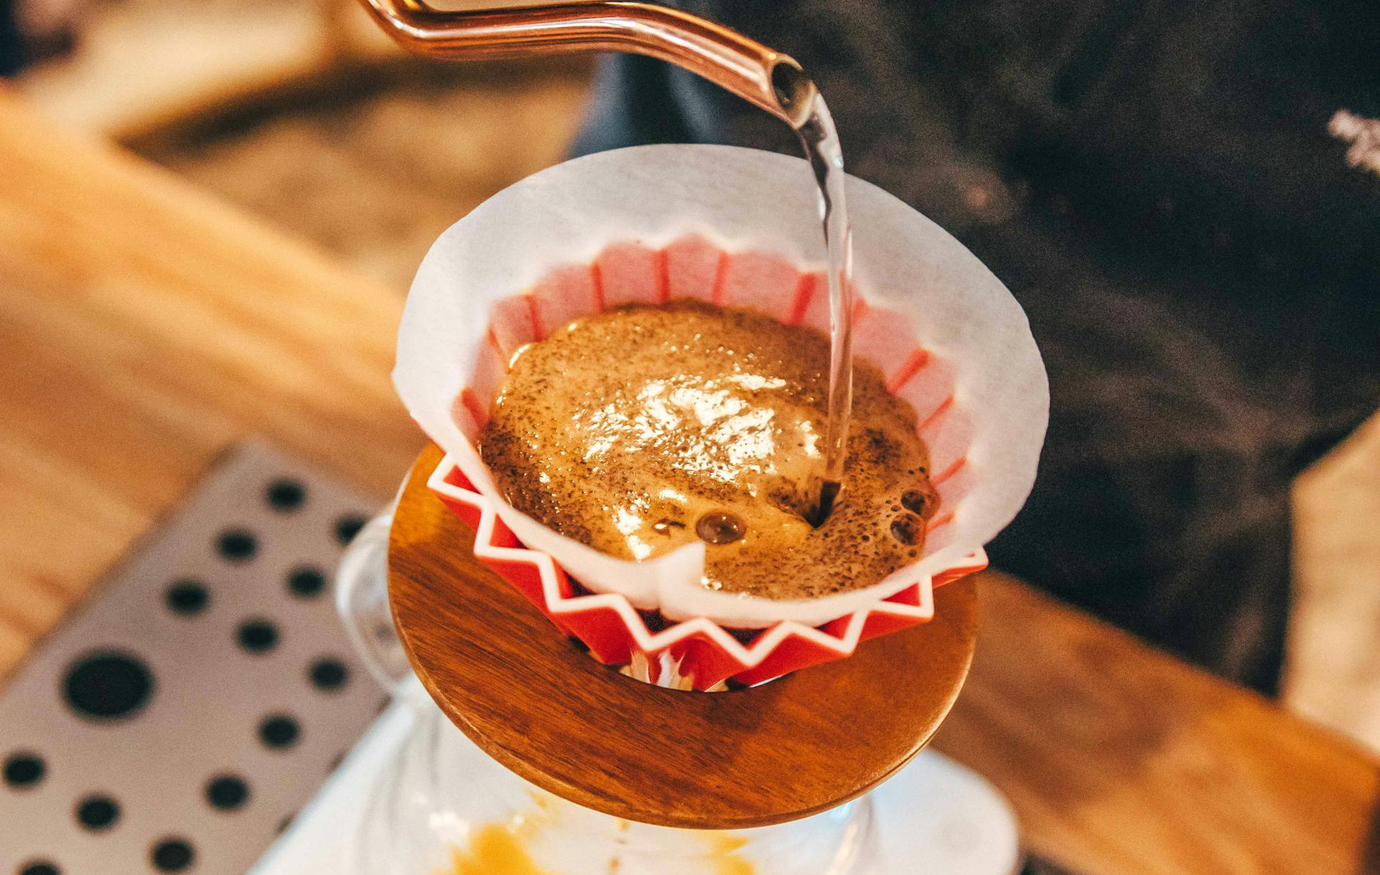
3. Blooming (Pre-infusion)
Measure the amount of water needed for each pour.

Example for a 140cc cup:
Prepare 160ml of hot water in the pot (92-96°C).
Pour 20g of hot water in a spiral motion starting from the center and moving outwards. Pour slowly and evenly to ensure all the grounds are wet.
If the coffee beans are fresh, they will release gas and bloom.
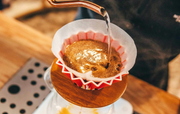
4. Pouring
- First Pour (80g): Pour slowly in a spiral motion starting from the center and expanding outwards, drawing circles the size of a 1-yen coin. Pour 80cc and then stop.
- Second Pour (40g): Once the water level drops to about one-third of the highest pour level, start the second pour. Draw circles the size of a 1-yen coin and pour 40cc, then stop.
- Third Pour (20g): When the water level drops slightly from the highest pour level, do the final pour. Draw circles the size of a 1-yen coin and pour 20cc. The resulting coffee should be around 70-75°C, with the optimal drinking temperature being around 65-70°C.
Check the grounds after the water has fully drained. If the center is slightly sunken and there is a uniform ring of grounds around the edge, you have successfully brewed your coffee.

Additional Notes:
Generally, warm foods are best enjoyed between 60-70°C, while cold foods are best between 5-11°C. For coffee, the optimal aroma is at 71°C and the best flavor is at 68°C.
Next article